.png)
Managing Users: How to Add, Remove, or Change Roles
This guide explains how to invite new team members to your organization, change their access permissions, or remove them from your workspace entirely.
Inviting a New User
To add a member to your organization, follow these steps:
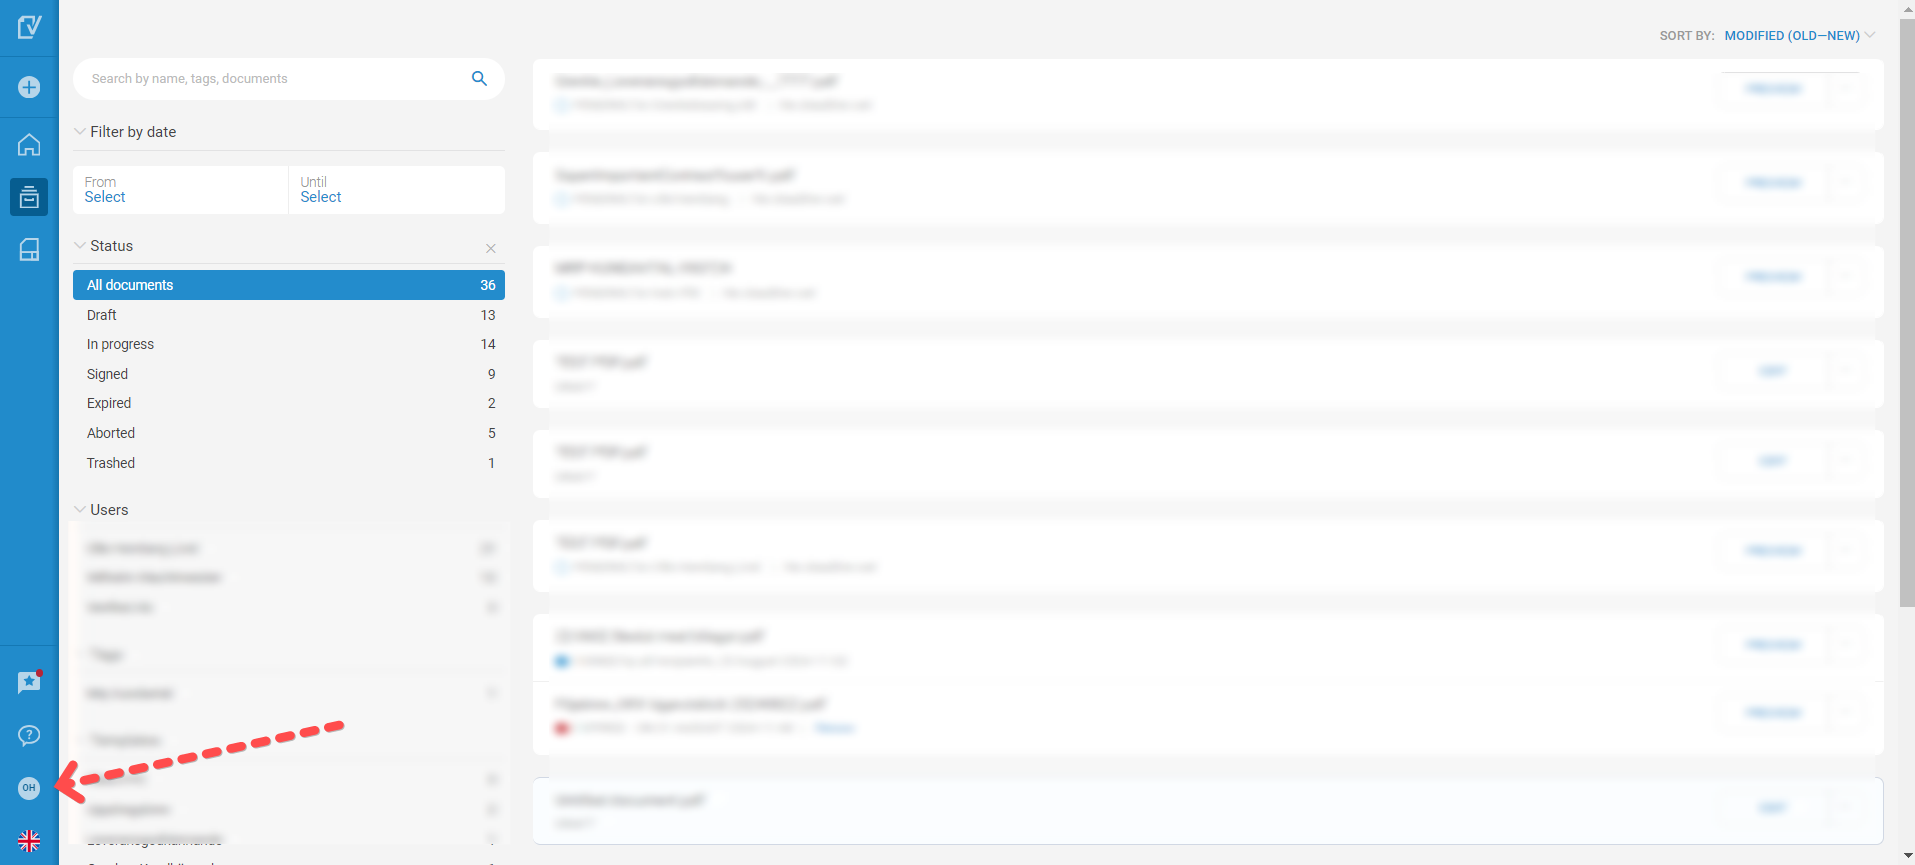
Click on your initials in the lower-left corner of the screen.
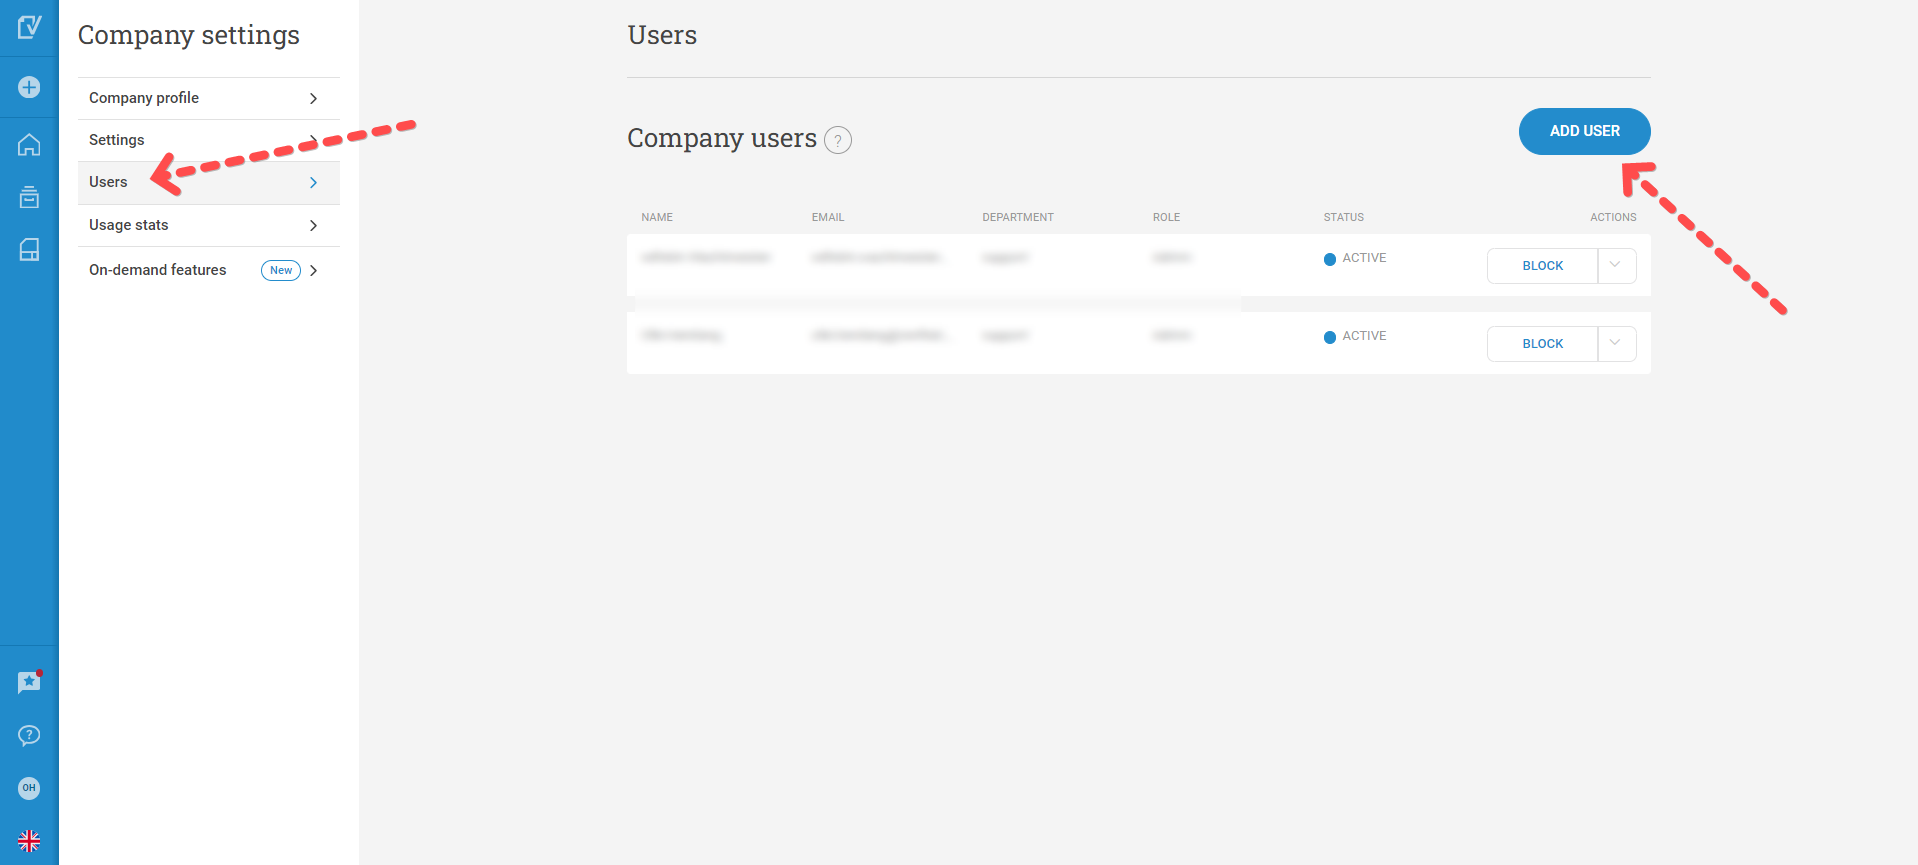
Select Company settings from the menu.
Navigate to Users, then click the ADD USER button.
Fill in the person's name and email address.
Select their workspace role from the dropdown menu and click Create.
⏱️ Important Invitation Window:The invited person has 24 hours to accept the invitation by clicking the activation link in their email and setting up their password.
🌐 Email Language Note:The invitation email is automatically sent in whichever language you currently have selected in your own personal profile settings.
⚠️ Cost Warning:Adding a new user to your workspace may incur additional subscription costs depending on your current plan. Please review your company agreement if you are unsure.
Removing a User or Changing Their Role
If a team member changes roles or leaves your company, you can update their permissions instantly:
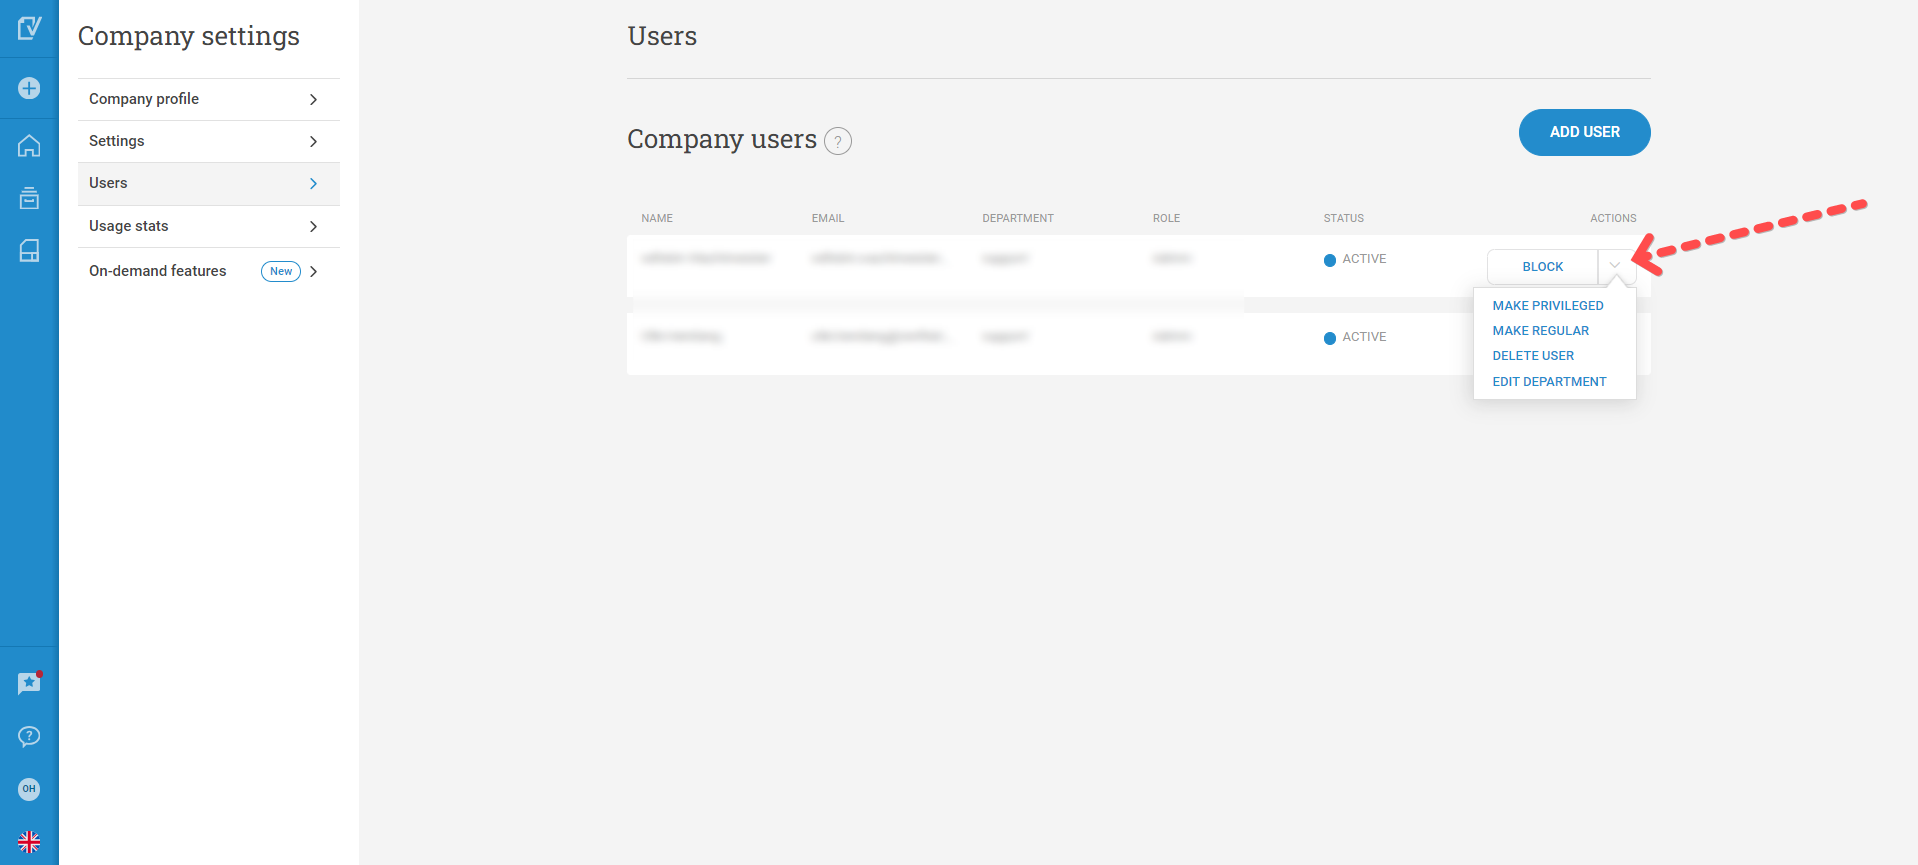
Go to Company settings > Users.
Locate the person you want to modify and click the down arrow next to their name.
Choose either to change their role or remove the user from the account.
🔒 Critical Safety Notes:
Envelopes are safe: Removing a user will NOT delete any signing envelopes or documents they previously created. All historical transaction data remains securely stored on your account.
The Admin Rule: Your organization must always keep at least one active Admin user on the account. The system will prevent you from deleting or downgrading the final remaining administrator.